
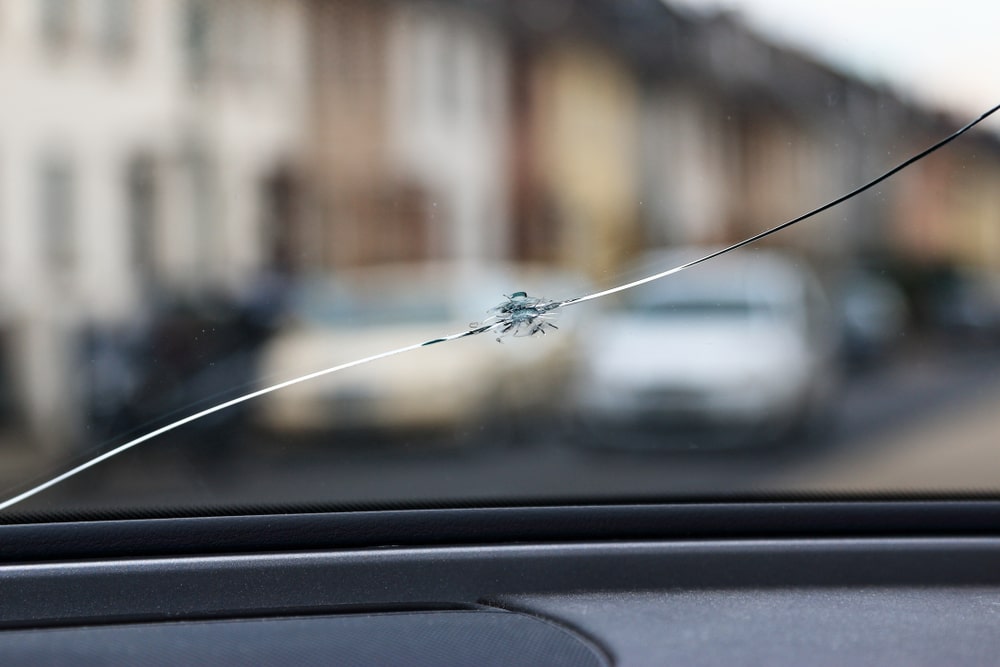
Windshield chips and cracks are a common problem for drivers. They can be caused by rocks, debris, or even temperature changes. If left unrepaired, they can worsen and become a safety hazard. However, getting your windshield professionally repaired can be expensive. The good news is that with a little bit of knowledge, you can repair your windshield yourself using a DIY kit. Here’s how to do it:
Step 1: Assess the Damage
The first step in repairing your windshield is to assess the damage. If the chip or crack is larger than a quarter, you will need to take your car to a professional. However, if it is smaller than a quarter, you can use a DIY kit to fix it yourself. You should also make sure that the damage is not in your line of sight, as this can impede your vision while driving.
Step 2: Purchase a DIY Repair Kit
There are many different types of DIY windshield repair kits available on the market. Some are more effective than others, so be sure to do your research before purchasing one. Generally, you can expect to spend around $10 to $20 for a basic kit. These kits typically include a resin, a syringe, and a curing film.
Step 3: Clean the Windshield
Before you begin the repair process, you will need to clean the damaged area of your windshield. Use a gentle glass cleaner and a microfiber cloth to remove any dirt or debris. This will ensure that the resin adheres properly to the glass.
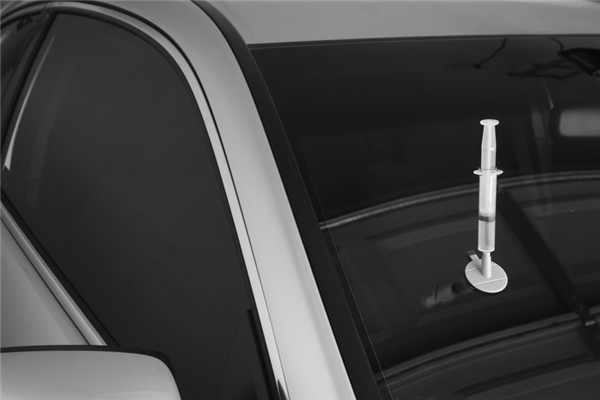
Step 4: Apply the Resin
Next, apply the resin to the damaged area using the syringe provided in your DIY kit. Be sure to follow the instructions carefully, as the application process can vary depending on the kit you have purchased. Once the resin is in place, cover it with the curing film provided in the kit.
Step 5: Allow the Resin to Cure
The curing process can take anywhere from 30 minutes to several hours, depending on the kit you have purchased. Be sure to follow the instructions carefully and allow the resin to cure completely before removing the curing film.
Step 6: Remove the Curing Film
Once the resin has cured, remove the curing film from your windshield. You may notice a small bump where the resin was applied, but this will smooth out over time. Use a razor blade to scrape away any excess resin, being careful not to damage the glass.
Step 7: Evaluate the Results
Finally, evaluate the results of your DIY repair. If the damage is still visible, you may need to repeat the process or take your car to a professional. However, if the repair was successful, you will have saved yourself time and money by fixing the problem yourself.
- Remember to always wear gloves and eye protection when working with resin.
- DIY windshield repair kits are not suitable for all types of damage.
- If the damage is in your line of sight, do not attempt to repair it yourself.
- It is important to repair windshield damage as soon as possible to prevent it from worsening.
By following these steps, you can successfully repair small chips and cracks in your windshield using a DIY kit. However, if the damage is larger or in your line of sight, it is best to take your car to a professional for repair or replacement.